Microsoft Office Word is a word processor that is widely used in homes, schools, and offices to create and edit documents. This is a basic tutorial for first time users of the program. Word isn't free. If you are looking to purchase a free word processor linux comes with Openoffice or you can go to openoffice.org.
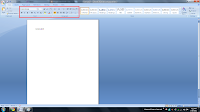
 When you first run Microsoft Office Word you will be confronted with something that looks like this. When you type with your keyboard the letter you hit will appear in the word displaying pane. If a word is misspelled it will be underlined with a red squiggling line. Right clicking the line will bring up a menu of suggested words, the ability to look the word up, ignore the error, or adding it to the dictionary. When you add it to the dictionary it will never tell you that word is misspelled again (Useful for unrecognized names).
 At the bottom left you will see a book and Word Count. Word count shows how many words you have saved in the document. The book will indicate a variety of things. If there is a red X over it then you misspelled something or used incorrect grammar. Clicking it will take you right to the word. If there is a blue check then it means your spelling and grammar checks out. The green line is a grammar line. It mainly appears when you right Sentence fragments. (Example: Sell did the.)
 Now it is time to learn some keyboard shortcuts. Over on the left side of the keyboard you should see a tab button. Hitting that will indent in the word document. Highlighting something and hitting Ctrl+C simultaneously will put it on the copy clipboard. The clipboard is a place where you can "copy" text to to "paste" it somewhere else later. To paste hold ctrl and hit V. This doesn't only apply to Microsoft Word. You can copy paste from anywhere and put it here, and vise versa.
Holding ctrl and hitting S is the shortcut to save the document. It is always a good idea to save even if document recovery has your back. There's nothing worse than losing hours of hard work. Be sure to Save AS something before saving. Saving as will give your document a title and tell you the directory from which you can access it. By default this should be your "My documents" directory. My Documents can be accessed from the start or Windows buttons and the "Documents" option on the right side. You have the ability to create, folders, and subfolders, (to infinity) in this directory. This way you can arrange things by category. (Example: School, Work, Novel, Account information.) You can return later by clicking the link to where you saved it from or opening it right from word with CTRL+O
Now let's examine the first two boxes at the top portion of the screen. The first box is font and everything in it is pretty much self explanatory. You can change the font size to a higher level (making it larger) or a lower level (making it smaller), Change font color, and change subscripts, highlight coloring, and extra text effects from here. Hovering over a button will tell you what it does. The second box is the paragraph box. From here you can change text alignment / justification, Make lists, alphabetize, and shade in the backround color.
The styles bar can be used for special occasions such as titling. Hover over a title box with highlighted text to see what it does.
What you should understand is that all of the things you have learned thus far are contained in the home tab. There are 7 tabs that you need to experiment with. Insert will be your next big one to learn about. From the insert tab you can input premade shapes, pictures, or custom designs built from a drawing pane. This is also the place to make charts, word art, blank pages, and hyperlinks. The insert tab will be included in a future tutorial of Microsoft Office word comes out.
Tutorials are released on a weakly basis the closest to Thursday that I can get. Stop back in on one of those days to see if a new Microsoft Word tutorial has shown up.
The australian writings admission admission papers as well scholarship essays for college applicants. They have a team. which provide top quality proofreading, editing, as well formatting services. The list of subject areas includes with all disciplines.
ReplyDeletewww.gseb.org Every state board conducts class 12 examination to all the eligible candidates and declares the exam results in less than a month
ReplyDeleteI love how detailed and clear this post is. You’ve really outdone yourself!
ReplyDeleteMicrosoft Word is a word-processing wootingdoublemovement software used for creating, editing, formatting, and printing documents easily.
ReplyDelete